Wednesday, May 18, 2011

Cheesy Potato and Parsnip Mash


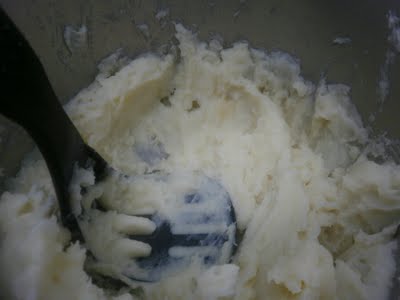
I have a confession to make. I am slightly obsessed with Nigella Lawson. I have 6 of her books and cook countless recipes regularly from them. I also have to admit that rather than reading ‘normal’ books about trains and dinosaurs to Mr almost 3, I’m regularly paging through one of Nigella’s books with him, drooling over her enticing photographs.  

I find the stories behind her recipes to be fascinatingly entertaining. She writes with such enthusiasm, it’s hard not to get caught up in the excitement of cooking her recipes and then indulging in the end product.

I’ve been inspired by countless of her recipes, adapting them to suit the children, sometimes with the final product being far from her original recipe!

In her book, Nigella Kitchen: Recipes from the Heart of the Home, she shares a recipe for “Tangy Parsnip and Potato Mash”. The idea of mash with extra vegetables appeals to my desire to provide the kids with a wide variety of veggies, outside of their comfort zone. Of course, “tangy” just wouldn’t work with the kids, so I omitted all spices, added some cheese and milk and we have a new family favourite!

Cheesy Potato & Parsnip Mash 

300g Parsnips
1 Kg Potatoes
½ Cup Milk
1 Cup Cheese

1.    Peel and Chop Parsnips and Potatoes


2.    Place chopped parsnips and potatoes into a pot and cover with cold water
3.    Bring up to the boil then simmer gently for 15 to 20 minutes, until soft enough to easily mash
4.    Carefully, drain the hot water from the pot
5.    Add the milk and cheese to the cooked potatoes and parsnips


6.    Mash until smooth and creamy. Enjoy!


This addictive Cheesy Potato and Parsnip Mash can be enjoyed as a side dish with your favourite casserole or stew.

I’ve also served the mash to Mr almost 1 for lunch, mixed with some tuna and vegetables. 

Please tell me I'm not the only one. Do you love Nigella Lawson's Recipes too? 


Cheesy Potato and Parsnip Mash Recipe Adapted from:

Monday, May 16, 2011

Rice is Nice! Easy Toddler Lunch Idea!

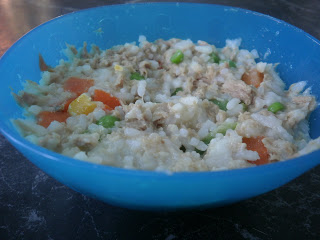
Rice is Nice! Well it is for my 10 month old. I’d say that he has a rice dish of some description for lunch most days of the week. I don’t think I’ve cooked quite as much rice as I have in the past few months for him!

Yesterday, after cooking plain white rice for his fussy older brother, I took a portion of rice for my 10 month old, added half a small tin of tuna, a few tablespoons of mixed frozen vegetables, grated cheese over the bowl and then I microwaved this for 30 seconds at a time until the veggies were cooked and cheese gooey and melted. This effortless dish was his lunch. A perfect Toddler Lunch.


My 10 month old is still, thankfully, at the eating everything, non-fussy stage. Oh, how I wish his fussy older brother, was the same... So, I can pretty much feed my youngest anything. His face lights up as the spoon approaches his mouth, he devours my latest cooking concoction, while making an abundant collection of mmmm... yummm... noises. Once he’s finished his bowl, he looks at me expectantly for more!

His agreeable attitude has inspired me to experiment to cook him a wide variety of food, in particular - rice. I have cooked with different rice varieties, vegetable combinations and cooking methods. Knowing that the results will be greedily welcomed and consumed is the best reward a mother could hope for.

Generally I’ll cook a cup of rice, along with my veggies of choice, in 2 cups of water. Once the water is absorbed I keep adding more, a half a cup at a time, until the veggies and rice are cooked. White rice with veggies takes about 20 to 25 minutes, while brown rice with veggies can take up to 45 mins to be fully cooked.

I’ll serve a portion up for today, pop one into a sealed container in the fridge for the next day and then freeze the rest. To freeze food for my toddler, I use a 12 cup mini muffin silicon baking tray. I freeze his food in these, popping out as many as needed for a meal and reheating it in the microwave. I tried using ice trays to freeze his food and the trays themselves ended up snapping once frozen a few too many times.

This image is a combination of rice, sweet potato and mushroom I made last week. Conveniently, I now have a couple of lunches waiting in the freezer to be defrosted and ready for the high chair in minutes.


I’d love to hear of your favourite rice dish, be it for yourself or your children.

Sunday, May 8, 2011

Mothers Day Zucchini, Leek & Broccoli Soup


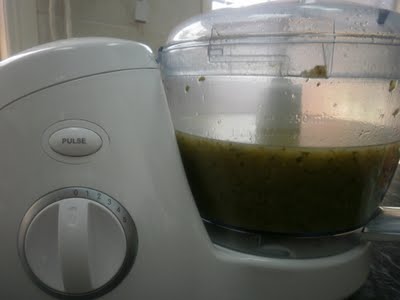
Welcome to Yummy Inspirations!

I thought I'd start my blog with one of my all time favourite soups. I cook this regularly through winter – it's full of veggie-goodness and has sweetness to it thanks to the juicy red apple.

The combination of vegetables, together with the apple may sound a little odd and a little too healthy, but I urge you to give the soup a try. I'm sure you'll be surprised by the fresh full flavour.

My Mom loves the soup too, so I'd like to dedicate the recipe to my Super-Mom, today, on Mother’s Day!

Another positive - this nutritious soup is also kid friendly. My 10 month old just loves it, on its own or as a "sauce" with some tiny pasta.

This recipe would serve 6 as a starter, so double it if you're feeding a crowd - or want yummy leftovers for a couple of days. 
Zucchini, Leek & Broccoli Soup –

1 Leek
1 Onion
1 tsp oil
300g Zucchini
250g Broccoli (I used about half a 500g bag of frozen Broccoli)
1 Red Apple
1 Litre Chicken Stock
1 tsp fresh chopped dill
Salt & Pepper to taste

1.    To prepare the leek, cut off the roots from the bottom and the leaves from the top. So you’ll be left with the white part in the middle. Wash the leek really well to ensure there is no dirt between layers.
2.    Chop the Leek & the Onion.
3.    Soften the leek and onion over low heat for 5 mins.


4.    Meanwhile, chop the zucchini and broccoli. Peel, core and chop the apple.
5.    Add the zucchini, broccoli and apple to the softened leek and onions.


6.    Throw over the chicken stock, add salt and pepper to taste, then bring to the boil and simmer for 20 mins. 
7.    Allow to cool then blend in a food processor until smooth.


8.    To serve – heat up, sprinkle over the fresh dill and enjoy!


Note that if you do intend on serving the soup to your child/children, omit the salt & pepper, adding it rather at the table.

With winter coming up, here in Australia, I'd love to hear of your favourite soup combination.  

Subscribe to receive FREE updates delivered to your inbox - Click Here to Subscribe!